The Ultimate Guide to Wood Duck Box Dimensions, Plans & Placement
There are few sights in the U.S. more dazzling than a male Wood Duck in full breeding plumage. With his iridescent green crest, ruby-red eye, and kaleidoscopic patterns, he looks more like a tropical creature than a North American native. But these remarkable birds are not just beautiful; they are a profound conservation success story. Once hunted to the brink of extinction, their populations rebounded in the 20th century thanks, in large part, to one simple thing: a man-made nesting box.
Unlike Mallards who nest on the ground, Wood Ducks are cavity nesters. They build their nests in hollow trees, often high above the ground or water. As old-growth forests and swampy bottomlands disappeared, so did their homes. The creation of a scientifically-designed Wood Duck box provided a safe, effective substitute and literally saved the species.
Today, you can participate in this incredible conservation story. Building and placing a Wood Duck box is one of the most rewarding advanced DIY projects for any nature lover. But here’s the catch: you must get the dimensions right. A box that is too small, too shallow, or has the wrong-sized hole will, at best, sit empty. At worst, it will become a death trap for the hen and her brood.
This is the definitive guide to Wood Duck box dimensions. We will cover not only the what (the exact measurements) but the why (the life-or-death reasons for them). We’ll also provide a full DIY plan, a buyer’s guide for tools, and a landlord’s guide to placement that will ensure your box becomes a safe, productive home for generations of Wood Ducks.
Wood Duck Box Dimensions: The Complete Guide
A Wood Duck nesting box is not just a shelter, it’s a precision-engineered fortress. Every measurement serves a biological purpose, ensuring safety for the hen and her brood while keeping predators, especially raccoons, out. Wood Ducks have unique needs, and their nesting box is unlike any typical birdhouse.
Below is the fully optimized, clearly structured guide to the exact dimensions and why each one matters.
1. Entrance Hole (Most Important Dimension)
Required Size:
4-inch wide × 3-inch high oval
Why it matters:
- This oval shape is the perfect size for a female Wood Duck.
- It is too narrow vertically for an adult raccoon to squeeze through.
- Raccoons have rigid shoulders and cannot pass through a 3-inch vertical opening.
Common mistake to avoid:
- A 4-inch round hole.
- A raccoon can easily enter a round 4″ opening and will kill the hen and eat all eggs.
- The oval hole is the only safe option.
2. Interior Floor Size
Required Size:
Minimum 10″ × 10″ (12″ × 12″ is acceptable)
Why it matters:
- Wood Ducks have large broods often 12–16 eggs.
- A spacious floor prevents overcrowding and trampling.
- Ducklings need room to move before “jump day.”
3. Interior Depth (Floor to Hole)
Required Size:
18 to 22 inches
Why it matters:
- Prevents raccoons from reaching inside even if they try to extend their arms.
- Provides insulation and reduces heat buildup.
- Keeps eggs and ducklings protected at the box bottom.
4. Total Box Height (Floor to Roof)
Required Size:
22 to 24 inches
Why it matters:
- Ensures the correct internal depth.
- Gives 3–4 inches above the hole to protect from rain entering the box.
5. Fledgling Ladder (Essential Interior Feature)
Required Material:
A 3–4 inch wide strip of hardware cloth (¼” or ½” mesh), stapled inside from floor to entrance hole.
Why it matters:
- Ducklings must climb 18+ inches to reach the opening on “jump day.”
- Their claws cannot grip smooth wood.
- Without a ladder, they become trapped and die.
Alternative method:
- Cut deep horizontal grooves (kerfs) every ½ inch on the inside of the front panel.
6. Bedding Material
Required Amount:
4 to 6 inches of wood shavings
Why it matters:
- Wood Ducks do not bring nesting material.
- Bedding cushions eggs (laid from standing height).
- Keeps the nest warm, dry, and safe for ducklings.
Summary of Essential Wood Duck Box Dimensions
- Entrance Hole: 4″ × 3″ oval
- Interior Floor: Minimum 10″ × 10″
- Interior Depth (Floor to Hole): 18–22 inches
- Box Height: 22–24 inches
- Fledgling Ladder: Hardware cloth or saw-cut grooves
- Bedding: 4–6 inches of pine or cedar shavings
Tools & Materials: Your Shopping List
Building a Wood Duck box is a serious project, and choosing the right materials will determine whether your box lasts 20 years or falls apart after one winter. Unlike small backyard birdhouses, this design requires durable wood, strong hardware, and precise measurements.
The classic Wood Duck box plan is smartly engineered to be built from one single 1″ × 12″ × 12′ untreated board, typically pine or cedar. This simple lumber choice keeps the project affordable, sturdy, and true to proven conservation designs.
BLACK+DECKER 20V MAX Jig Saw

You cannot make the 4×3 inch oval entrance hole without a jigsaw. This is the only common tool capable of making smooth curved cuts. The 20V cordless model from BLACK+DECKER is affordable, powerful, and perfect for this project. You will drill a starter hole and then use the jigsaw to cut the oval.
Pros:
- Essential for cutting the oval entrance hole
- Cordless design for easy handling
- Tool-free blade changes
- Great value and highly versatile
Cons:
- Battery and charger may be sold separately
DEWALT 20V MAX Cordless Drill Kit

This box is held together with long, heavy-duty screws. You need a powerful drill. This DEWALT 20V MAX is the gold standard for DIYers. It will drive 3-inch screws into 1-inch lumber all day long. You’ll also use it to drill your drainage holes and the starter hole for your jig saw.
Pros:
- High-torque motor for driving long screws
- Long-lasting 20V battery
- Durable and reliable for years
- A must-have for any home project
Cons:
- A premium-priced tool, but a true investment
9 x 2-1/2″ Star Drive Exterior Coated Deck Screws

Do NOT use nails or interior drywall screws. This is a heavy box that will hang in the elements for decades. Nails will work loose, and interior screws will rust and fail. You must use high-quality exterior-rated deck screws. These 2-1/2″ screws are perfect. The star drive (Torx) head is a pro feature that prevents stripping, saving you a ton of frustration.
Pros:
- Weather-resistant coating prevents rust
- Star drive head is superior to Phillips
- Strong grip for a heavy, durable box
Cons:
- Requires a specific star-drive bit (often included)
Kaytee Pine Bedding Animal Shavings

This is your nest starter. You must add 4-6 inches of this to the bottom of your box. Wood Ducks will not carry material in. This bag of kiln-dried pine shavings is perfect. It’s clean, dry, absorbent, and provides the essential soft cushion for the eggs and a warm, dry bed for the 15+ ducklings.
Pros:
- 100% required for Wood Duck nesting
- Kiln-dried to be absorbent and safe
- Provides cushion for eggs and warmth for young
- Inexpensive and a single bag lasts a long time
Cons:
- Needs to be replaced annually
DEWALT 12-Inch Miter Saw

While you can make all your straight cuts with the jig saw, a miter saw makes it 100x faster and more accurate. This plan requires a 22-degree angle cut for the roof, which is what a compound miter saw is made for. This DEWALT 12-inch saw is a buy it for life tool that will handle this 1″x12″ board with ease and make every cut perfectly square.
Pros:
- Creates perfectly accurate, fast cuts
- Essential for making the 22-degree roof angle
- 12-inch blade cuts a 1″x12″ board in one pass
- A fantastic upgrade for any serious DIYer
Cons:
- A significant investment
- Not strictly necessary, but highly recommended
The Classic DIY Plan: One 1″x12″x12′ Board
This plan is a conservation classic. It’s efficient, minimizes waste, and results in a box with the perfect 10.25″ x 10.25″ interior floor (since a 1″x12″ board is actually 11.25″ wide, and you lose some width to assembly). Curious about how long it takes to build a birdhouse like this? Set aside a good 2-3 hours for cutting, assembly, and prep.
DIY Wood Duck Box: Cut List
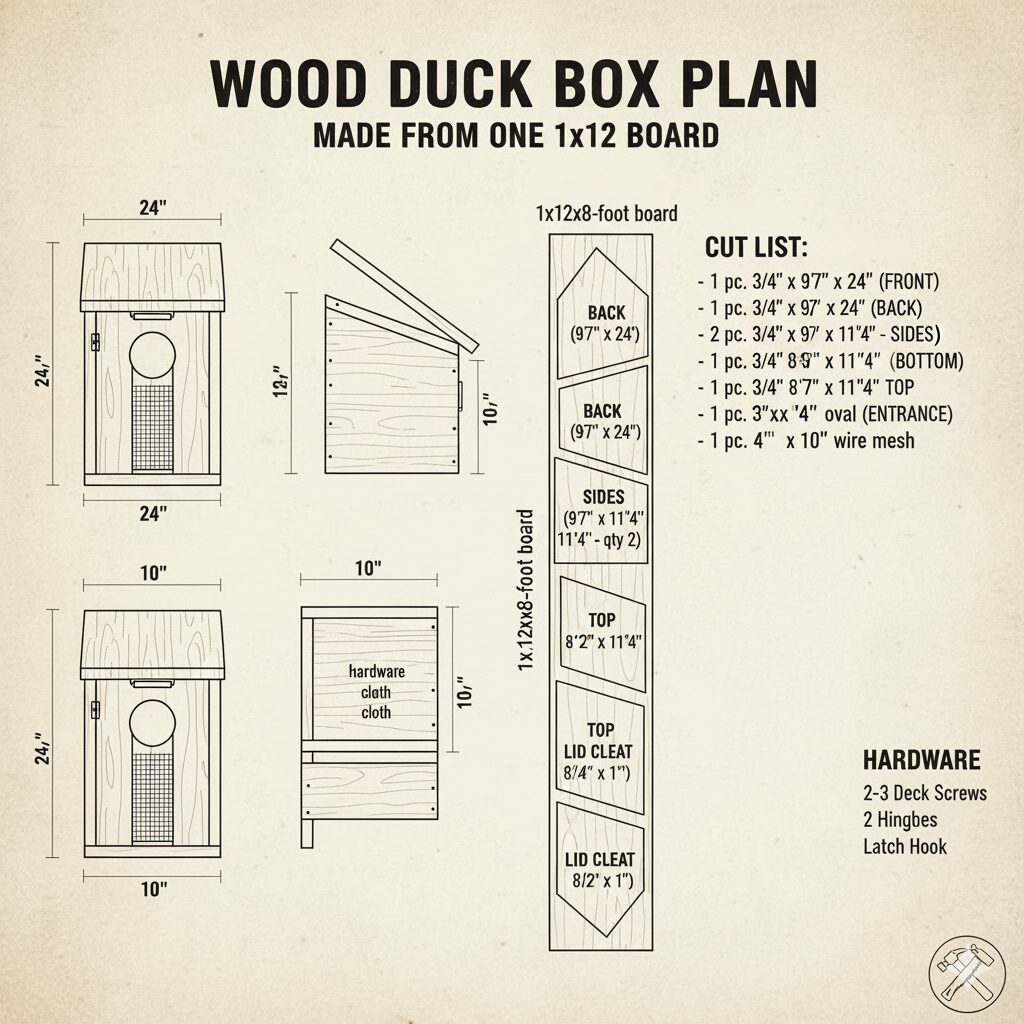
Lumber needed: one 1 x 12 x 12 foot untreated pine or cedar board
(Actual dimensions: 0.75 x 11.25 x 144 inches)
Set your miter saw to a 22 degree angle for the following cuts. All angled cuts are parallel.
- Front: 1 piece, 23 inches on the long side, 19 inches on the short side
- Back: 1 piece, 27 inches on the long side, 23 inches on the short side
- Sides: 2 pieces, each 23 inches on the long side and 19 inches on the short side
- Floor: 1 piece, 10.25 inches long, cut at 90 degrees
- Roof: 1 piece, 14 inches long, cut at 90 degrees
You will have some leftover scrap from the board.
Step by Step Assembly
1- Add bedding
Open the cleanout side and add a 4 to 6 inch deep layer of pine shavings.
2- Prepare the front
Take the 23 inch front piece. Measure 4 inches down from the top short edge. Mark a 4 inch wide by 3 inch high oval and cut it out using a jigsaw.
3- Prepare the fledgling ladder
On the inside of the front piece, create the interior ladder.
You can staple a 4 inch wide strip of quarter inch hardware cloth from the bottom of the hole to the floor level, or set a circular saw to a quarter inch depth and cut horizontal grooves every half inch down the front interior.
4- Prepare the floor
Take the 10.25 inch floor piece and drill six half inch drainage holes.
5- Assemble the box
Lay the 27 inch back piece flat on your workbench.
Place the floor piece on top, flush with the short bottom edge, and screw it into the back.
Place one of the side pieces upright, flush with the back and floor, and screw it into both.
Place the front piece on next and screw it into the floor and attached side.
At this point you have a three sided box with a floor.
6- Create the cleanout door
The second side piece will serve as a hinged cleanout door and should not be fully screwed into place.
Set the side piece in position.
Drill two holes, about three eighths of an inch, one near the top and one near the bottom.
Insert a galvanized carriage bolt or cotter pin through each hole to hold the door closed.
This allows you to remove the pins and swing the side open for cleaning.
7- Attach the roof
Place the 14 inch roof piece on top. The angled top edges of the box will form the proper slope.
Center the roof so it overhangs on all sides.
Screw it into the front, back, and the fixed side only.
Do not attach it to the cleanout door.
8- Add bedding
Open the cleanout side and add a 4 to 6 inch deep layer of pine shavings.
The Landlord’s Guide to Wood Duck Box Placement
You have built a strong, predator-resistant Wood Duck box. Now comes the most important part: choosing the right location. Most Wood Duck box failures happen because the box is placed incorrectly or isn’t protected from predators.
The Myth: It Must Be Over Water
This is the biggest misconception. While Wood Ducks often use boxes placed on poles in ponds or marshes, it is not required. They will gladly nest up to half a mile from the nearest water source.
Placement rule: Install your box within 200–300 yards of a pond, marsh, swamp, river, or lake. After the ducklings jump, the female will walk them to the water.
In some situations, placing a box directly over water can actually increase risk if the pole isn’t predator-proof. Raccoons can wade through shallow water, and aquatic predators like snapping turtles may attack ducklings below.
Pole Mount vs. Tree Mount
The Best Choice: Pole Mount
A pole is the safest and most reliable option. Use a 4×4 pressure-treated post or a sturdy metal birdhouse pole.
Why this works:
A smooth pole allows you to install a predator baffle, which is essential for protecting the hen and her brood.
The Weak Choice: Tree Mount
Although ducks will use boxes mounted in trees, it is nearly impossible to make them truly safe.
Why it fails:
Raccoons can climb any tree, and you cannot install an effective baffle on a trunk. A tree-mounted box invites predators.
Predator Guard: Non-Negotiable
A Wood Duck box without a baffle is unsafe. Raccoons will climb the pole, enter the box, and destroy the entire nest if unprotected.
What a baffle is:
A cone-shaped or cylindrical metal barrier attached beneath the box.
How it works:
The animal climbs the pole, reaches the smooth, wobbly surface, and cannot climb over.
Installation rule:
The top of the baffle must be at least 4 feet above the ground.
Placement Quick Guide
Mounting height:
The box should be 10–30 feet above the ground. A practical setup is to position the bottom of the box around 8–10 feet high, with the baffle 4 feet above the ground.
Distance to water:
Install within 200–300 yards of a suitable water source.
Direction:
Facing the entrance toward the water or an open flight path works best. East-facing is a good default.
Visibility:
Ensure the entrance hole is clearly visible from above. Avoid dense foliage.
Final Thoughts
Taking care of a Wood Duck box is a serious long-term commitment. With the proper build, correct placement, and a reliable predator guard, your box can support successful nesting for many years. Patience is part of the process. Once a hen finally chooses your box and you witness the ducklings’ first leap into the world, you’ll know your effort has made a meaningful contribution to conservation.
Frequently Asked Questions
Will other birds use a Wood Duck box?
Yes. These boxes are also used by Hooded Mergansers, American Kestrels, and Eastern Screech Owls.
Should I paint the box?
Natural wood is best. If you choose to paint, use neutral earth tones. Never paint the inside.
Will cardinals or hummingbirds use it?
No. Neither species uses birdhouses.
Is the box too big for a small yard?
Possibly. This is a specialty box. Smaller yards are better suited for wren or chickadee houses.
Do Wood Ducks use boxes in winter?
No. They migrate. However, screech owls, woodpeckers, and other resident birds may roost inside during cold months.
Do birds sleep in birdhouses?
Yes. Many birds use houses at night for warmth and protection.
Can I install a camera inside?
Yes. A wireless birdhouse camera with night vision works very well in a Wood Duck box.
Are gourds an option?
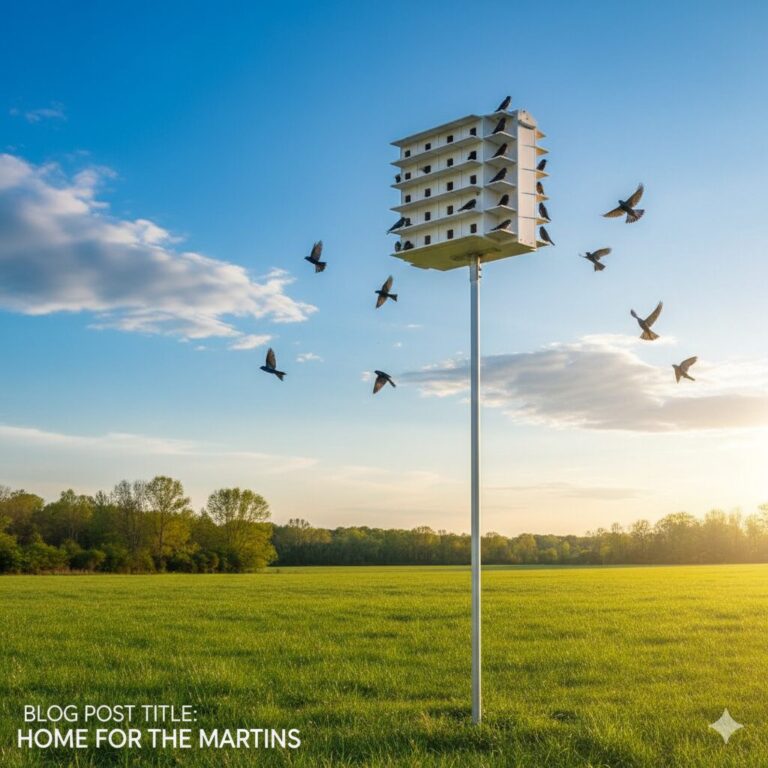
Not for Wood Ducks. Gourds are useful for species like Purple Martins, chickadees, or wrens.
How do I prevent wasps from building nests?
Rub the inside of the roof and upper walls with a bar of unscented soap in spring. This prevents wasps from attaching their nests.
I’m not a DIY person, what should I do?
You can buy pre-made boxes. Or consider starting with bird feeders if you want an easier hobby.
Can I hang a Wood Duck box from a hook?
No. A full box can weigh 40–50 pounds. It must be mounted on a solid post.
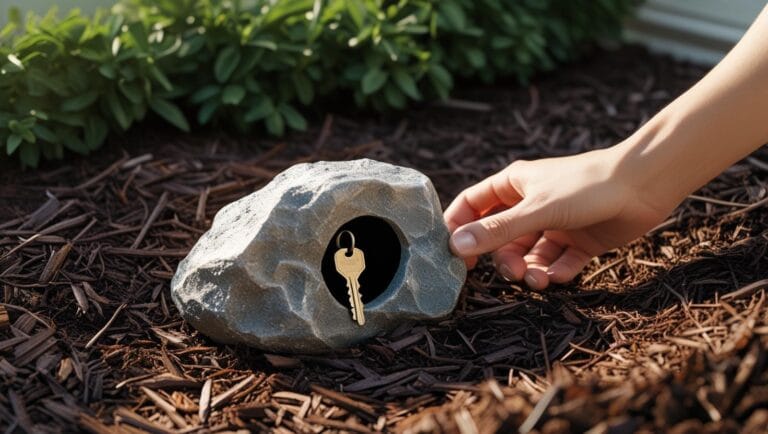
What if I lock myself out while working?
Store a key in a key hider so you don’t get stuck outside during your project.
Want to travel for birdwatching?
Consider exploring birdwatching road trip guides to discover amazing places to see wildlife.

Sanom is a lifelong nature enthusiast and passionate backyard birder who has spent years observing bird behavior and building DIY birdhouses. With a deep curiosity for species like chickadees, wrens, and woodpeckers, he shares practical tips and heartfelt stories to help others attract, shelter, and appreciate the wild birds around them. Whether you’re crafting your first birdhouse or simply enjoying morning songbirds, Iftekhar’s guides on BirdHouseTales.com are designed to bring you closer to the magic of birdwatching.